Starting a photography business in the US involves more than just taking great photos. To succeed, you need to focus on three key areas:
- Define Your Niche: Choose a specific type of photography (e.g., weddings, portraits, real estate) that aligns with your skills, interests, and local demand.
- Create Clear Packages: Offer structured service options with transparent deliverables like session length, number of edited images, and turnaround time. Include add-ons like prints or extra hours to increase revenue.
- Set Profitable Pricing: Calculate your costs, desired income, and market rates to establish fair pricing. Use a mix of cost-plus and value-based pricing strategies.
- Build a Strong Portfolio: Showcase 15–30 high-quality images that reflect the services you offer. Keep it updated and organized by niche to attract your target clients.
Focus on testing your packages and pricing with early clients, gathering feedback, and adjusting as needed. Tools like IdeaFloat can help validate demand, analyze competitors, and optimize pricing strategies. With the right approach, you can turn your passion for photography into a profitable business.
How I'd Start My Photography Business in 2025 (And Blow It Up)
Choosing Your Photography Niche and Services
Before deciding on packages or pricing, it’s important to focus on a specific area of photography. This helps you avoid spreading yourself too thin and ensures your brand stands out. Many successful photographers in the US build their reputation by becoming experts in a particular niche.
Your ideal niche lies where three things overlap: what you enjoy shooting, the skills and equipment you already have, and the demand from local clients. If one of these is missing, you could end up doing work you don’t enjoy, struggling to meet quality expectations, or failing to attract customers.
Popular Photography Niches in the US
The photography market in the US is diverse, offering several established niches, each with its own client expectations and earning potential:
- Wedding Photography:
Weddings can be highly profitable, often involving full-day shoots during peak seasons. However, they come with high-pressure situations, requiring you to manage complex family dynamics and deliver exceptional results. - Family and Portrait Photography:
This niche offers steady, year-round work, with increased demand around holidays and back-to-school times. It’s a great choice if you enjoy working with kids and building long-term relationships, as families often return for updated portraits as they grow. - Real Estate Photography:
With the rise of online property listings, this area has seen rapid growth. Clients often need quick turnarounds and may seek extras like drone shots or virtual tours. The predictable nature of property listings can allow you to book multiple sessions in a single day. - Brand and Commercial Photography:
This involves creating images for businesses to use in marketing materials, websites, and social media. Success in this niche requires understanding marketing strategies and collaborating closely with clients to meet their branding needs. Projects can vary greatly in scope and pricing.
To determine which niche suits you best, research local demand through online directories, community groups, and forums. Explore the websites and social media profiles of local photographers to see which services are popular and how much they charge. Pay attention to trends, such as niches that are oversaturated or areas with little competition, to identify opportunities.
Validating Your Niche with IdeaFloat
Once you’ve chosen a niche, use IdeaFloat to validate its market potential. This tool can help you determine whether there’s real demand for your services and if clients are willing to pay for them.
The platform’s Problem Validator lets you analyze whether your niche addresses specific needs. For example, instead of guessing what brides want in a wedding photographer or what realtors expect for property listings, you can use the Consumer Insights feature to explore online forums, social media, and community discussions. Capturing the exact language potential clients use can help you craft marketing messages that truly connect.
IdeaFloat’s Competitor Analysis provides a clear view of your market by identifying existing providers, spotting gaps, and uncovering opportunities to set yourself apart. With data from reliable sources, you can make informed decisions rather than relying on guesswork.
Taking the time to validate your niche now can save you from months of frustration trying to attract clients in a market that doesn’t align with your services.
Creating Photography Packages
Once you've defined your niche, the next step is to create clear, well-structured photography packages. These packages not only simplify the decision-making process for potential clients but also help ensure your business remains profitable. The key is to provide options that feel worthwhile and easy to understand.
Start by identifying what your clients actually need. Use your niche research to list common requests. For example, wedding photographers are often asked for full-day coverage, engagement sessions, or custom albums. Real estate photographers, on the other hand, might frequently be asked to deliver a specific number of property images, drone footage, or twilight shots.
It's also important to align your packages with local preferences. If wedding album printing is trending in your area or clients are requesting specific backdrops or outdoor locations, tailor your offerings to meet these demands.
What to Include in a Photography Package
Your photography packages should clearly outline what clients are getting. This transparency helps them feel confident in their purchase.
- Session Duration: Specify how long the session will last. For instance, a family portrait session might last an hour, while a wedding package could cover the entire day. Be clear about start and end times, and mention if travel time is included.
- Number of Edited Images: Avoid vague promises like "all images." Instead, guarantee a specific number of fully edited, high-resolution photos.
- Turnaround Time: Let clients know how quickly they'll receive their photos, and offer expedited delivery as an optional upgrade.
- Usage Rights: Clearly state what usage rights are included, such as personal use for printing and social sharing. Commercial rights may require additional licensing.
- Delivery Method: Explain how clients will receive their photos - whether through an online gallery, USB drive, or another format.
To make your offerings feel more concrete, include sample photos in your marketing materials. When designing your packages, consider offering three or four tiers to keep things simple:
- Base Package: Covers essential services at an entry-level price, such as a short session, a limited number of edited images, and online gallery access.
- Standard Package: Builds on the base package with additional coverage, more edited photos, and extras like a small print package.
- Premium Package: Offers the most comprehensive experience, including extended coverage, a larger selection of edited images, premium print products, and other perks.
Make sure each tier stands out. For example, instead of just listing "8 hours of coverage", describe what sets your approach apart, such as capturing candid moments or guiding group photos. Also, include clear policies on weather, cancellations, session extensions, and any extra fees to avoid misunderstandings.
Add-Ons for Upselling
Add-ons are a great way to give clients more flexibility while increasing your revenue. Here are some options to consider:
- Additional Hours: Offer extra session time for clients who want extended coverage.
- Rush Delivery: Provide expedited editing for those with tight deadlines.
- Extra Edited Images: Allow clients to purchase additional photos beyond their package limit.
- Prints and Albums: Include options for prints, canvas wraps, or custom albums for clients who want physical keepsakes.
- Second Photographer: For large events, a second photographer can provide broader coverage.
- Engagement or Mini Sessions: Offer shorter sessions as an add-on to help clients feel more comfortable in front of the camera.
- Video Highlights or Drone Footage: If it suits your style, offer video highlights or aerial shots as part of a more extensive package.
Using Comparison Tables
Comparison tables are an effective way to showcase your packages side by side, making it easy for clients to understand the differences. Here's an example for wedding photography:
| Feature | Base Package | Standard Package | Premium Package |
|---|---|---|---|
| Coverage Hours | Limited coverage | Moderate coverage | Extended coverage |
| Edited Images | Basic set | Larger collection | Comprehensive set |
| Turnaround Time | Standard delivery | Faster delivery | Priority delivery |
| Engagement Session | Not included | Included | Included |
| Second Photographer | Not included | Not included | Included |
| Photo Album | Not included | Includes an album | Includes a premium album |
| Prints | Not included | Select set of prints | Extensive print collection |
| Online Gallery | Limited-time access | Extended access | Lifetime access |
| Price | Entry-level pricing | Mid-range pricing | Premium pricing |
For family portrait sessions, the table might look like this:
| Feature | Mini Session | Classic Session | Signature Session |
|---|---|---|---|
| Session Length | Brief session | Standard session | Extended session |
| Edited Images | Small selection | Moderate selection | Comprehensive collection |
| Locations | Single location | Single location | Multiple locations |
| Outfit Changes | Limited | A couple of changes | Multiple options |
| Turnaround Time | Standard timeframe | Standard timeframe | Faster delivery |
| Print Credit | Basic credit | Moderate credit | Enhanced credit |
| Price | Entry-level pricing | Mid-range pricing | Premium pricing |
Place these tables prominently on your pricing page and in client proposals. Make sure they're mobile-friendly, as many clients will view them on their phones. This approach helps clients easily compare options and choose the package that best suits their needs.
Setting Competitive Pricing
Pricing your photography services can feel like walking a tightrope. If your rates are too low, you risk not covering your costs or being undervalued. But if your prices are too high without a solid portfolio to back them up, you might scare off potential clients. The challenge is to find that perfect balance - rates that reflect your worth while staying competitive in your local market.
The key to setting your pricing lies in understanding that it’s not about copying what others charge. Instead, it’s about covering your expenses, paying yourself fairly, and setting your business up for long-term success. Many new photographers simply mimic competitors’ rates without considering their own costs or goals. This often leads to financial strain or burnout.
Understanding Pricing Strategies
There are two main ways to approach pricing in photography: cost-plus pricing and value-based pricing. Knowing how these work can help you make smarter decisions about your rates.
Cost-plus pricing is straightforward. Start by calculating all your expenses - think equipment, software, insurance, marketing, travel, and your personal income goals. Then, add a profit margin. This ensures your costs are covered and you're making a profit, but it doesn’t factor in the perceived value of your work or what clients are willing to pay.
For example, let’s say your expenses total $25,000, and you want to earn $50,000 annually. That means your revenue goal is $75,000. If you have 1,440 billable hours per year, your minimum hourly rate would be about $52. This gives you a baseline to work from.
Value-based pricing, on the other hand, is about what your work is worth to the client. For instance, a wedding photographer isn’t just taking pictures - they’re preserving memories that last a lifetime. Similarly, a real estate photographer helps agents sell homes faster and sometimes at higher prices. When you focus on the value your work brings, you can often charge more than a cost-plus calculation would suggest.
Most successful photographers use a mix of both strategies. Start with cost-plus pricing to establish your minimum rate, then adjust based on your experience, portfolio, and the unique value you offer. Keep in mind that your local market plays a big role, too. Rates for a wedding photographer in New York City will look very different from those in rural Montana, not just because of cost-of-living differences but also client expectations and budgets. Research what others in your area charge, but always factor in your own costs and value.
Calculating Your Minimum Pricing
Before you can set competitive rates, you need to figure out your minimum pricing - the lowest amount you can charge without losing money. This involves a clear understanding of your expenses and billable hours.
Start by listing all your annual expenses. These include:
- Equipment: Cameras, lenses, lighting, and maintenance.
- Software: Editing programs like Adobe Lightroom or Photoshop, which typically cost $10–$20 per month.
- Insurance: Business insurance can range from $500–$1,500 annually.
- Website and marketing: Hosting, domain registration, and promotional materials can add up to $1,000–$3,000 annually.
- Travel: Don’t forget to account for mileage, which is reimbursed at $0.67 per mile (2024 IRS rate).
Also, plan for equipment maintenance and replacement. Setting aside 10–15% of your gear’s value annually for repairs is a smart move. Once you’ve totaled your expenses, add your desired income. If photography is your full-time gig, this income should cover living expenses, taxes, and savings.
Next, calculate your billable hours. While you might work 40 hours a week, not all of those hours are billable. Editing, client communication, social media management, and bookkeeping take up a lot of time. A full-time photographer might realistically expect 20–25 billable hours per week, while part-timers might only have 5–10 hours.
Account for downtime like vacations, sick days, or slow seasons. For example, wedding photographers often have busy spring and fall seasons but experience slower winters. Real estate photographers may see fluctuations depending on the housing market.
Here’s an example: If your annual expenses are $15,000 and you want to earn $45,000, your total revenue goal is $60,000. If you work part-time with 10 billable hours per week for 48 weeks (allowing for 4 weeks off), that’s 480 billable hours annually. Dividing $60,000 by 480 hours gives you a minimum hourly rate of $125.
If you offer packages instead of hourly rates, make sure they meet your minimum rate. For instance, a wedding package priced at $2,000 that takes 20 hours to complete (shooting, editing, and client communication) only earns you $100 per hour - below your $125 minimum. In that case, you’d need to either raise your price or streamline your process.
Track your time during the first few months of business. You might find that certain tasks, like editing or client communication, take longer than expected. Use this data to fine-tune your pricing and improve efficiency.
Comparing Pricing Models
Once you’ve determined your minimum rate, it’s time to choose the best pricing model for your services. Photographers typically use one or a mix of three models: hourly pricing, package pricing, and day rates. Each has its benefits and drawbacks depending on your niche and goals.
| Pricing Model | Best For | Pros | Cons |
|---|---|---|---|
| Hourly Pricing | Corporate headshots, small projects, quick sessions | Easy to calculate; simple for clients; flexible for varying scopes | Penalizes efficiency; clients may feel rushed; harder to predict income |
| Package Pricing | Weddings, family portraits, events | Clear costs for clients; rewards efficiency; simplifies upselling | Requires accurate time estimates; can be complex to structure |
| Day Rates | Commercial shoots, real estate, large events | Predictable income; simplifies booking; ideal for intensive work | Not ideal for shorter sessions; requires clear scope definition |
Hourly pricing is great for projects with unpredictable scopes, like corporate headshots or small commercial shoots. However, as you become faster and more skilled, this model may not fully reflect your expertise.
Package pricing works well for events and portraits, giving clients a clear understanding of what they’re paying for. For example, a wedding package might include shooting, editing, and consultations, with tiers for added services. It also makes upselling easier - clients can see the benefits of upgrading to a higher package.
Day rates are ideal for intensive projects, like real estate or commercial shoots. They simplify pricing for full-day work, whether you’re photographing multiple properties or managing a complex shoot.
Many photographers combine these models. For example, you might use packages for weddings, hourly rates for headshots, and day rates for commercial work. The goal is to choose the model that fits each service while ensuring it meets your revenue requirements.
As your skills grow and your portfolio expands, revisit your pricing. Adjust your rates to reflect your experience, improved efficiency, and increased demand.
sbb-itb-08dd11e
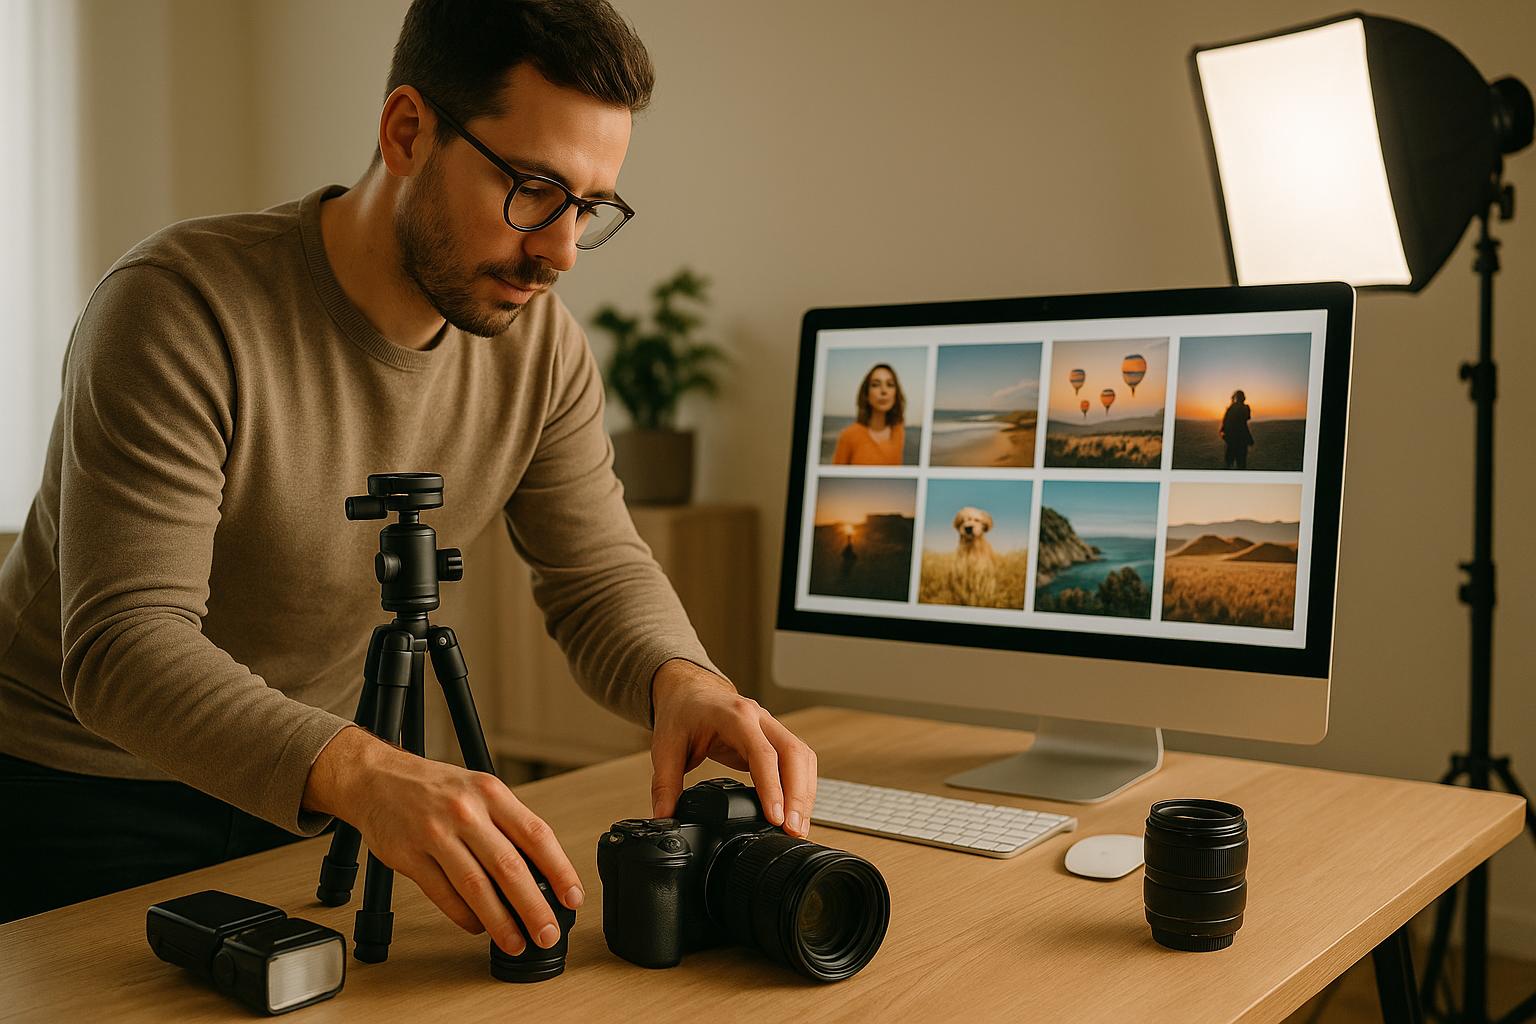
Building a Professional Portfolio
A well-designed portfolio does more than just display your work - it reinforces the value of your services and supports your pricing. For photographers, it’s one of the most powerful tools to market your skills, style, and appeal to potential clients.
One common mistake new photographers make is overloading their portfolios with too many images. This can dilute the overall impact and confuse potential clients. Instead, prioritize showcasing your strongest work that aligns with the services you offer. For instance, if your goal is to book wedding clients, including landscape photography - even if it’s stunning - may not resonate with your target audience.
Think of your portfolio as a dynamic, ever-evolving document. Keeping it updated and relevant is crucial to staying competitive.
What to Include in Your Portfolio
Aim for 15–30 high-quality images total (or 10–15 per niche). Agencies and potential clients typically spend just 5–10 minutes reviewing a portfolio, so every image needs to count.
Focus on work that demonstrates your technical skills, creativity, and unique perspective. Ask yourself: Does this image showcase mastery of lighting, composition, and editing? Does it tell a story or evoke emotion? If you’re unsure, it’s better to leave it out.
Your first and last images are particularly important. The first image sets the tone and determines whether someone will keep browsing, while the last image leaves a lasting impression. Choose these carefully to reflect the type of work you want to be hired for.
Consistency is key. Group your images by style, mood, or theme to create a cohesive presentation. For example, if your niche is light and airy wedding photography, avoid mixing in dark, moody shots that don’t align with your brand.
Within each niche, showcase variety. Include a mix of angles, aspect ratios (landscape and portrait), and lighting conditions to highlight your versatility. For instance, demonstrate your ability to handle soft natural light as well as dramatic artificial setups.
Add context to your images with captions. Include details such as the location (e.g., "Captured at Central Park, New York, NY"), session type (e.g., "Engagement shoot"), or techniques used. These specifics help potential clients envision their own sessions and understand the quality of your work.
Finally, sprinkle client testimonials throughout your portfolio. Testimonials build trust and credibility, helping convert visitors into clients. Place them near related images to reinforce the quality of your work.
Portfolio-Building Strategies for Beginners
If you’re just starting out and don’t have a client base yet, there are plenty of ways to build a professional portfolio.
Personal projects are a great place to begin. These allow you complete creative control. For example, if you’re interested in family portraits, invite friends or relatives for a styled shoot at a local park. If real estate photography is your focus, offer to photograph homes for free in exchange for portfolio rights. Personal projects let you experiment and build a collection of work that reflects your vision.
Offering discounted or free sessions is another way to gain experience quickly. Consider running mini-sessions at a reduced rate to attract clients who may not be ready for full-priced bookings. Be upfront about using the images for your portfolio.
Styled shoots are especially useful for wedding or event photographers. Collaborate with vendors like florists, makeup artists, and event planners to create a fully styled session. For instance, teaming up with a wedding planner in Charleston, SC, for a bridal shoot at a historic venue can yield stunning content while building professional relationships.
Second shooting is another excellent strategy, particularly for weddings or events. Reach out to experienced photographers and offer to assist as a second shooter. This hands-on experience not only teaches you professional workflows but also provides portfolio-worthy images (with proper usage rights).
As you build your portfolio, focus on showcasing the type of work you want to be known for. If your goal is high-end wedding photography, ensure your portfolio reflects that level of quality and professionalism from the very beginning.
Organizing and Showcasing Your Portfolio
How you present your portfolio can make or break its impact. A well-organized, fast-loading portfolio creates a smooth experience that encourages potential clients to explore your work further.
Organize your portfolio into galleries by niche or theme, such as Weddings, Family Portraits, Real Estate, or Corporate Headshots. Limit the number of galleries to 4–6 with clear, straightforward names so clients can easily navigate.
Within each gallery, arrange images thoughtfully to create a compelling flow. Start with a strong, eye-catching image and vary the composition, lighting, and subject matter to maintain interest. Avoid grouping similar images together; instead, alternate between wide shots and close-ups or between bright and moody tones to keep viewers engaged.
Make sure your portfolio is optimized for mobile devices. A fast-loading, minimal design ensures your work shines on any screen size.
Include a clear call-to-action on every page of your portfolio. Whether it’s a "Book a Session" button, a contact form, or a link to your pricing page, make it simple for clients to take the next step.
Here’s a quick checklist to ensure your portfolio meets professional standards:
| Portfolio Element | Requirement |
|---|---|
| Total Images | 15–30 high-quality images (or 10–15 per niche) |
| Gallery Organization | 4–6 distinct galleries with clear, simple names |
| First & Last Images | Strong, memorable images that represent your best work |
| Image Variety | Mix of angles, aspect ratios, lighting styles, and moods |
| Captions | Include location, session type, or technique details |
| Client Testimonials | Positioned near relevant images to build credibility |
| Mobile Optimization | Fast-loading, responsive design tailored for mobile devices |
| Call-to-Action | Clear, prominent contact or booking button on every page |
| Update Frequency | Refresh your portfolio at least 2–4 times per year |
Regular updates are essential to ensure your portfolio reflects your current skills and style. Keep it fresh, relevant, and aligned with your professional goals.
Validating and Refining Your Business Model
Once you’ve outlined your packages, set your prices, and built your portfolio, the hard work truly begins. A successful photography business isn’t static - it evolves. To stay relevant and meet client expectations, you’ll need to regularly assess and tweak your business model. The best photographers treat this as an ongoing process, constantly testing and refining their offerings.
Many beginners make the mistake of treating their initial pricing and packages as set in stone. They launch with a specific structure and stick to it - even when bookings are slow or clients frequently request changes. This inflexibility can limit your growth and leave potential earnings untapped.
The most successful photographers take a different approach. They view their services and pricing as experiments. By launching, gathering feedback, and making informed adjustments, they find the sweet spot where their offerings align with what clients are looking for and willing to pay.
Testing and Iterating on Your Offerings
Start by testing your packages and pricing with a small, targeted group before rolling them out on a larger scale. Offer your services to 5–10 potential clients - this could include friends, family, or people who fit your ideal client profile. This controlled testing phase allows you to gather valuable feedback without risking your broader reputation.
Pay close attention to how people react to your pricing. Are they hesitant? Do they ask for modifications or seem unclear about what’s included? If you notice recurring questions or requests for specific add-ons, that’s a clear sign you need to adjust your offerings.
Track key metrics to understand how your packages are performing. For instance, monitor your inquiry-to-booking conversion rates, the average package value clients choose, and which add-ons are most popular. If you offer three wedding packages priced at $1,500, $2,500, and $4,000, and most clients go for the lowest option, it might signal that your mid-tier package isn’t appealing enough, or your pricing might be too high for your audience.
Pricing experiments often yield measurable results. Research shows that businesses implementing a price-testing strategy saw a 6% increase in gross profits. Among 811 pricing tests conducted across over 300 retailers, better pricing was found 54% of the time. Notably, 52% of the winning prices differed by at least ±10% - and sometimes as much as 30% - from the original price, demonstrating that initial strategies are often far from optimal.
After each session, establish a feedback loop with clients. Ask whether the package structure was clear, if they felt the pricing was fair, and what could have improved their experience. These conversations can uncover valuable insights you might otherwise miss.
Document your findings. Over 10–15 bookings, patterns will emerge. For example, you might notice clients consistently requesting more edited photos than your packages include or showing a preference for digital files over printed ones. Use this data to refine your offerings. If clients frequently request certain add-ons or additional images, consider incorporating those features into your packages at a slightly higher price.
It’s worth noting that 96% of e-commerce retailers who conducted at least three pricing tests found better pricing strategies, underscoring the importance of ongoing refinement. The same principle applies to photography - your initial pricing structure is rarely the most effective.
Using IdeaFloat Tools for Validation
To complement your real-world testing, leverage tools designed to validate and refine your business model. IdeaFloat offers a suite of resources tailored for photographers, helping you make data-driven decisions instead of relying on guesswork.
- Problem Validator: This tool helps determine whether your service packages address real client needs. For example, before diving into a niche like real estate photography, use this tool to assess demand and urgency.
- Advanced Pricing Research: Take the uncertainty out of pricing. This tool analyzes market trends and applies proven pricing strategies to help you optimize your rates. You can even let AI adjust your prices based on competitor data or use the insights to make manual adjustments.
- Financial Projections & Breakeven Analysis: Understand how pricing changes impact your bottom line. This tool provides month-by-month revenue and cost projections, helping you visualize how different scenarios affect your breakeven point.
- Product & Service Creator: Map out your entire service lineup and estimate how many bookings you need to hit your income goals. Whether you use AI to build your product list or do it manually, this interactive tool clarifies the path to profitability.
- Cost Analysis: Don’t overlook hidden expenses that can eat into your profits. From camera insurance (about $50 per month) to editing software subscriptions (around $20 per month) and travel costs, this tool ensures you account for every expense before setting your prices.
Combine these tools with real-world feedback. Use IdeaFloat’s insights to set your initial pricing, test it with clients, and gather feedback. After making adjustments, revisit the Financial Projections tool to confirm that your changes are improving profitability. This continuous cycle of testing and refining ensures your business model stays profitable and aligned with client expectations.
Conclusion
Starting a photography business boils down to five key steps: choosing your niche, designing clear packages, setting profitable pricing, building a standout portfolio, and refining your approach based on real-world feedback.
Your niche is the foundation of everything. Whether you specialize in weddings, real estate, portraits, or product photography, this decision shapes your pricing, equipment needs, and the type of clients you’ll attract. Trying to cater to everyone often leads to being stretched too thin - specialists not only charge more but also establish stronger reputations.
Once you’ve defined your niche, focus on creating packages with clear deliverables. Include details like the number of edited photos, hours of shooting, and turnaround times. To boost revenue, consider offering optional add-ons that let clients tailor their experience while increasing your average booking value.
When it comes to pricing, make sure you’re covering more than just your time. Factor in costs like equipment, software, insurance, travel, and post-processing. Calculate your minimum viable rate and test it with clients to see what resonates. Pricing isn’t set in stone - you’ll refine it as you learn more about your market and its expectations.
Your portfolio is your strongest sales tool, so make it count. Focus on quality over quantity - 15 to 20 outstanding images will always outshine a larger collection of average work. Organize your portfolio by category and ensure it’s easily accessible through a professional website.
With your packages, pricing, and portfolio in place, the next step is validation. Your initial offerings are educated guesses, but real client feedback will help you refine them. Work with 5 to 10 clients, track conversion rates, and analyze which packages perform best. If clients frequently request the same tweaks or add-ons, use that insight to adjust your offerings.
For ongoing growth, tools like IdeaFloat can streamline the process. Use the Problem Validator to confirm demand for your niche before committing to specialized gear. The Advanced Pricing Research tool can help you gauge how your rates compare to competitors, while the Financial Projections feature shows how many bookings you need each month to stay profitable. The Cost Analysis tool ensures you’re accounting for all expenses, so nothing eats into your margins unexpectedly.
Ultimately, the choices you make early on - niche, packages, and pricing - set the stage for continuous improvement. Building a successful photography business isn’t just about talent; it’s about taking action, gathering feedback, and adapting. Every client interaction and booking is an opportunity to learn more about your market and refine your approach.
So, take the first step today. Your photography business won’t come together overnight, but with every session you shoot and every client you work with, you’ll move closer to creating a sustainable, profitable venture. Stay disciplined, stay adaptable, and watch your business grow.
FAQs
How do I choose the best photography niche based on my skills and local market needs?
To get started, think about what excites you most as a photographer and where your skills truly shine. Do you love capturing the magic of weddings, bringing out personality in portraits, or showcasing properties through real estate photography? Pinpoint the styles you enjoy and excel in - it’s a great way to focus your efforts.
Next, take a close look at your local market. What photography services are people actively seeking? Weddings, portraits, product shoots, or even real estate photography might be in demand. Check out what your competitors are offering and see if there’s a gap you could step into. Maybe there’s an underserved need you can address with your unique approach.
Also, consider who your ideal clients might be and what they need. For instance, if your community has a lot of small businesses, you could offer professional branding or product photography to help them stand out. By aligning your passion with what’s in demand, you’ll carve out a niche that’s both enjoyable and profitable.
How can I set my photography prices to be both competitive and profitable?
To set photography prices that are both competitive and profitable, start by breaking down your costs. This includes everything from equipment and travel to editing time and general business expenses. Once you have a clear picture of your expenses, decide on a profit margin that aligns with your financial goals and incorporate it into your pricing.
Take the time to research your local market. Look at what other photographers with similar experience are charging, and adjust your rates to reflect your unique value and level of expertise. This helps ensure your pricing is both reasonable and reflective of what you bring to the table.
Offering tiered packages is a great way to appeal to a range of budgets while still showcasing your skills. For instance, you could offer basic, standard, and premium packages, each with different levels of service. On top of that, consider using psychological pricing techniques - like setting your rate at $299 instead of $300 - to make your prices feel more attractive.
Ultimately, your rates should mirror the quality of your work and the value you provide. Avoid undervaluing your skills; clients often associate higher prices with better quality.
How can I create a strong photography portfolio when I’m just starting out and don’t have many clients?
Building a solid portfolio when you're just starting out is all about highlighting your talent and creativity. Begin by offering to photograph friends, family, or local events for free or at a discounted rate, as long as you can use the photos in your portfolio. Another great option is to create personal projects or set up mock shoots to showcase your skills and vision.
Make sure to prioritize quality over quantity - choose only your strongest work that reflects your unique style and range. Once you've selected your best shots, present them on a professional website or share them on social media to start catching the attention of potential clients.
Related Blog Posts

Get the newest tips and tricks of starting your business!